Getting Started with Matrox Design Assistant
Download PDF - GSM-Matrox-Design-Assistant
Preparing for Use
Before you use your Point Grey camera, we recommend that you are aware of the following resources available from our Point Grey Downloads page:
- Getting Started Manual for the camera—provides information on installing components and software needed to run the camera.
- Technical Reference for the camera—provides information on the camera’s specifications, features, and operations, as well as imaging and acquisition controls.
- Firmware updates—ensure you are using the most up-to-date firmware for the camera to take advantage of improvements and fixes.
 |
To set up your Point Grey camera to work under Matrox Imaging Library, follow the instructions in Getting Started with Matrox Imaging Library. |
Installation and Configuration
Matrox Design Assistant 4.0 supports USB3 Vision and GigE Vision cameras.
Step 1--Install Design Assistant
Download Design Assistant from the Matrox website and follow the installation instructions. During the installation process, select USB3 Vision and GigE Vision support.
Note: USB3 Vision cameras also require the installation of Matrox SP1.
Step 2--Connect the Camera to the PC
Connect the camera to the PC. For information, see the camera’s Getting Started Manual.
Step 3--Start Design Assistant
To start Design Assistant:
- Launch Matrox Imaging Library Control Center.
Start Menu → All Programs → Matrox Imaging Library → Matrox Imaging Control Center. - Under Design Assistant 4.0, click Matrox Design Assistant.
- Click Connect Local.
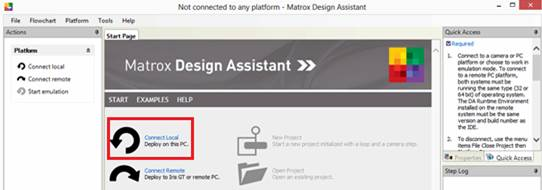
- Open a project.
- To open an existing project, on the Start Page, click the Open Project icon.
OR - To start a new project, click New Project, enter the name and click OK.
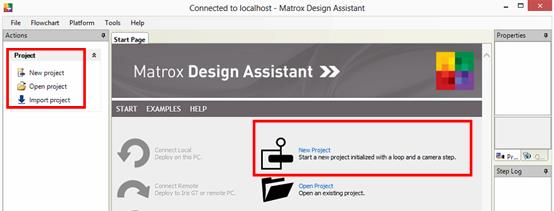

Design Assistant configures the system and allocates a camera.
Step 4--Configure Initial Camera Settings (Optional)
To configure camera settings:
- Right-click on the down arrow on the Flowchart and select Add Step.
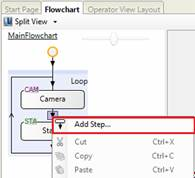
- Select CameraSettings and click Add.
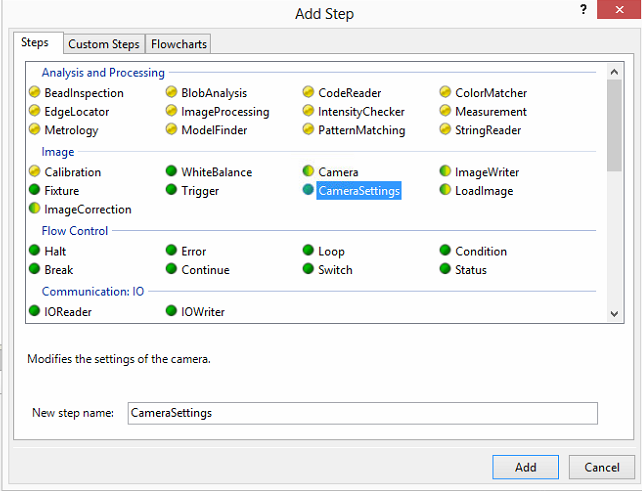
- Select CameraSettings in the Flowchart and click Edit GenICam features to change camera settings.
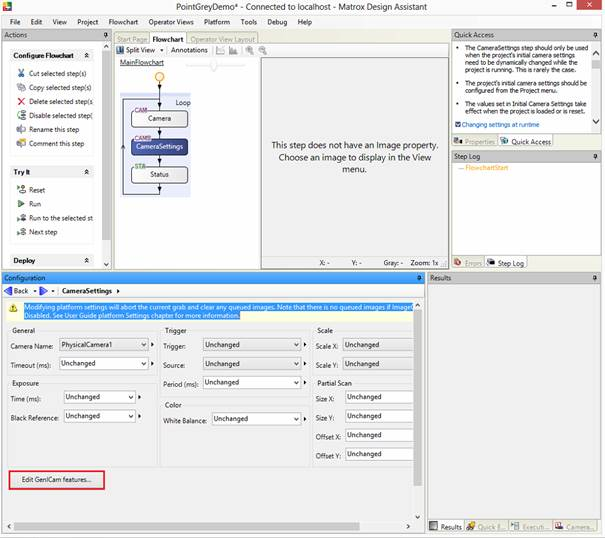
- Click Add.

- Select the camera attribute, change the value, and click Add.

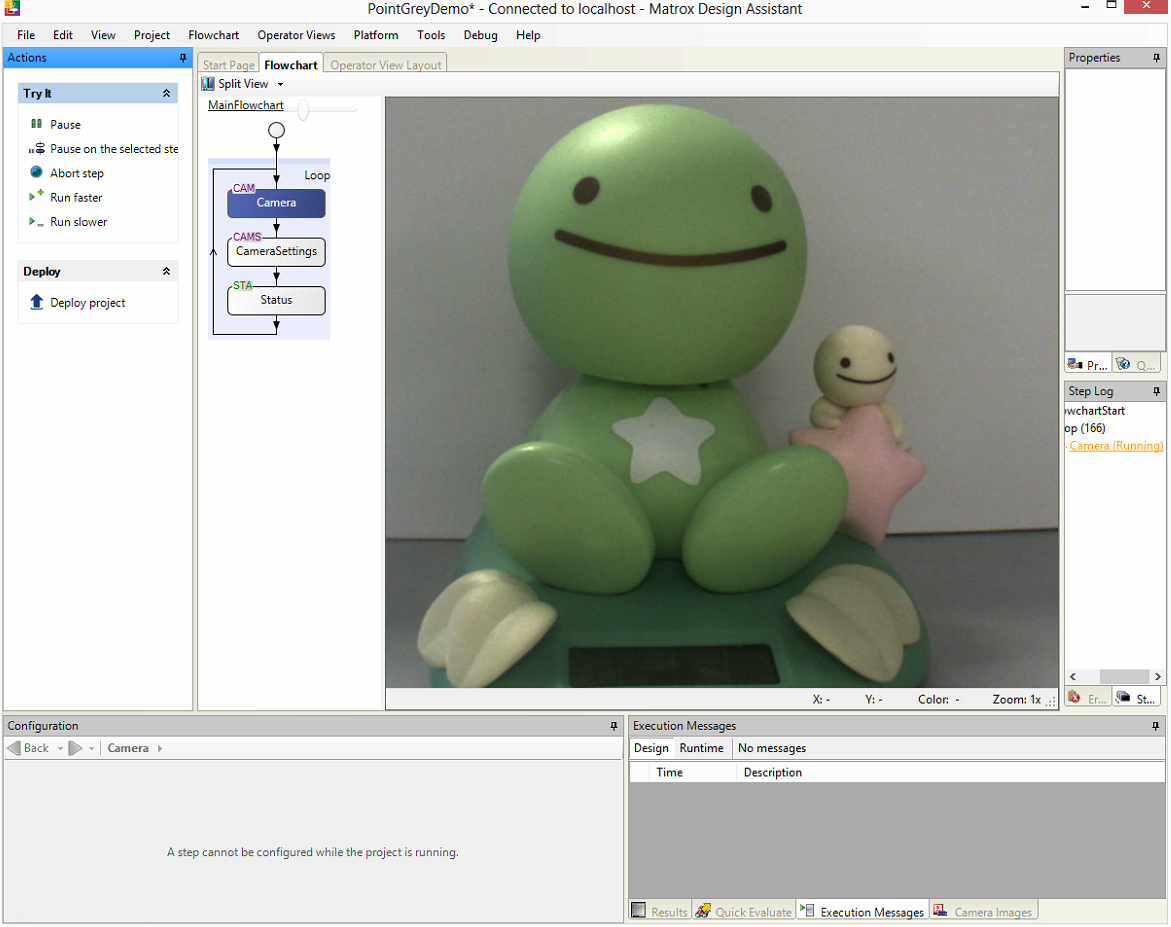
Step 5--Start Acquisition
To start acquisition, in the Action pane, click Run or press F5.
Troubleshooting Tips
How Do I Correct a Camera Allocation Error?
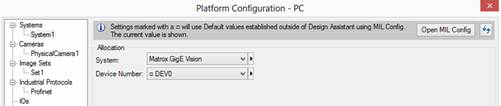
If your camera has an allocation error, you may need to set the Initial Platform Settings to the correct system.
To adjust your settings:
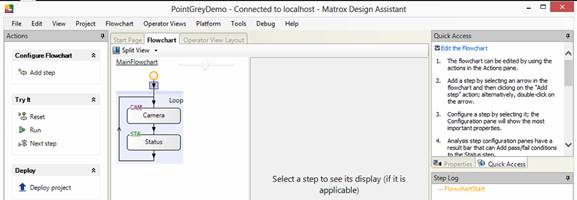
- In the Flowchart window, select Camera.
- Click Initial Platform Settings and browse to System1 tab.
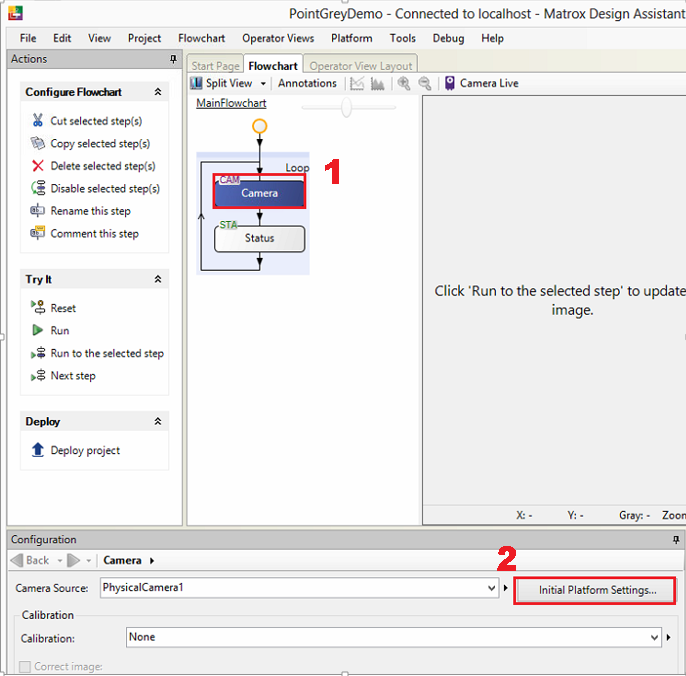
- Set your system to the appropriate camera:
- To stream a GigE Vision camera, set your system to GigE Vision.
- To stream a USB3 Vision camera, set your system to USB3 Vision.
The following additional suggestions may help you troubleshoot issues with your camera.
- Update the driver to the latest version.
- Update the firmware to the latest version.
- Update the software to the latest version.
- Perform a soft reboot and if still necessary a hard reboot of the PC.
- Disable then enable the driver.
- Power cycle the camera. The following additional suggestions may help you troubleshoot issues with your camera.
- Power the camera through GPIO, if wiring harness is available.
- Use a separate host controller instead of an integrated one, if available.
- Ensure the card is powered via the 4-pin hard drive connector, if applicable.
- Use a different cable or host controller or PC.